This post will walk you through the necessary steps to configure OpenAM to authenticate users automatically using Windows Desktop SSO (Integrated Windows Authentication). The OpenAM configuration is quite straightforward, but there are a number of things that need to be in place on the Windows side for everything to work correctly.
Overview of Steps
- Set up the required forward and reverse lookup DNS records for OpenAM.
- Make a Kerberos principal and keytab file in Active Directory using the ktpass command.
- Configure OpenAM for Windows Desktop SSO.
- Configure your web browser.
- Make sure profiles can be loaded from the Active Directory dataStore.
- Configure OpenAM to fallback to a username and password when Windows Desktop SSO fails.
Prerequisites
This guide assumes the following prerequisites are in place:
- An OpenAM deployment (I'm using OpenAM 13.5 here) set up on the hostname openam.windom.example.com.
- A Windows Active Directory domain controller with Active Directory certificate services installed (this automatically enables LDAPS on port 636).
- This server has the hostname: svr1.windom.example.com, using the windows domain windom.example.com.
- OpenAM setup with an Active Directory dataStore, with users being able to log on using a username and password.
- A test Windows Desktop or a separate session on your test domain controller.
I've previously written blog posts on
setting up a test Active Directory domain and setting up an
Active Directory dataStore. I've used these as a starting point for the steps in this post.
Setting up DNS
- A user may access OpenAM via a given hostname, which would often point to a load balancer.
- The user must be able to resolve the OpenAM IP address from a DNS forward lookup on the hostname.
- The hostname returned from a reverse DNS lookup on the OpenAM IP must match the hostname used in the forward lookup.
- A keytab file should be generated with a Kerberos principal name, which consists of a hostname and a realm name. The hostname in the principal name must match the hostname by which the user can access OpenAM, even if that is the external load balancer hostname.
- The principal name configured in the OpenAM Windows Desktop SSO module must match the principal name of your key in your keytab file.
My steps below will show how to configure the required DNS records an Active Directory DNS service. If this is anything more than a test Active Directory instance, you'll want your friendly Windows SysAdmin to carry out these steps for you.
For Windows Desktop SSO to work, the URL accessed by the user must resolve on a forward AND a reverse DNS lookup with the same IP address and host. This is part of the
Kerberos Spec.
If you don’t have a reverse lookup zone configured on a DNS server in your active directory domain (isn’t set up by default), you’ll need to set one up in DNS Management (dnsmgmt.msc):
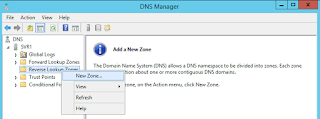
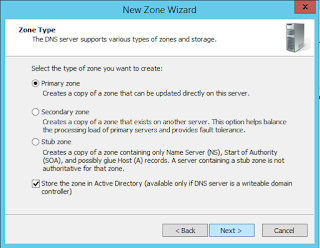

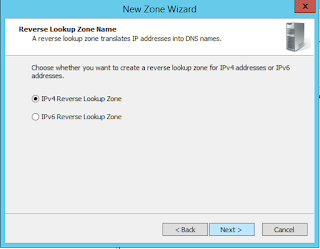
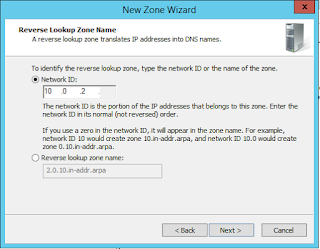
Now it's time to specify the subnet for your reverse lookup zone. Note that as part of the DNS standard, only class A, B and C blocks are supported.
The subnet here should contain what is seen to be the IP address of OpenAM from the user's point of view. This is probably the subnet containing your load balancer address.
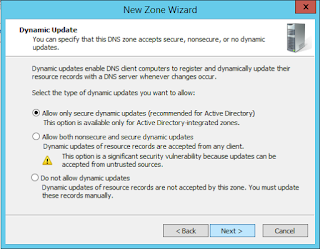
Now create a reverse DNS record for OpenAM. If OpenAM is behind a load balancer, use the IP address of the load balancer. If you don't already have a forward lookup record ('A' record) then you can create both a forward reverse lookup record at the same time when creating an 'A' record by selecting "create associated pointer record":


If you already have an 'A' record for OpenAM, you can assign a PTR record (reverse lookup record) to OpenAM by right clicking on your reverse lookup zone and selecting "New Pointer (PTR)..."
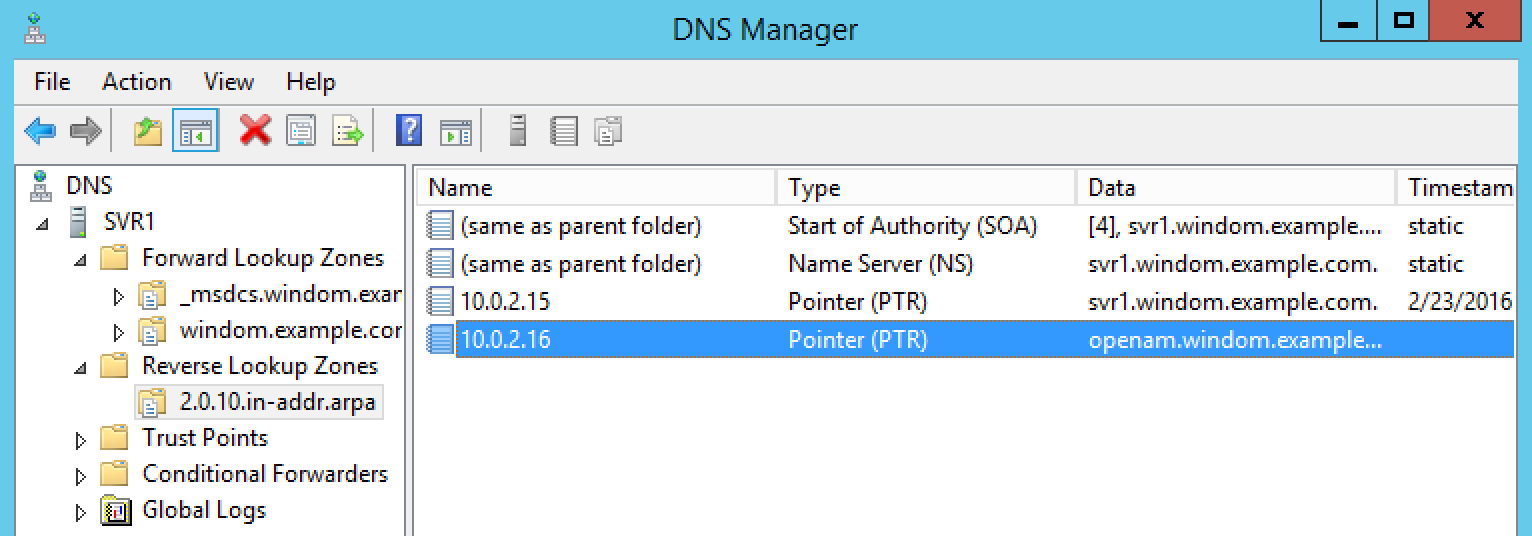
Now that everything is in place, you should be able to perform a forward and reverse DNS lookup on OpenAM and get matching results, like in the following screenshot:

Create an account in active directory for your Kerberos principal
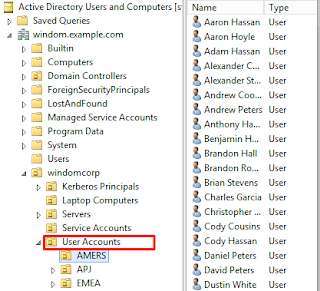
Create an account in Active Directory Users and Computers (dsa.msc) to use as your Kerberos principal. Don’t worry about what the password is, you are about to change it in the next step.


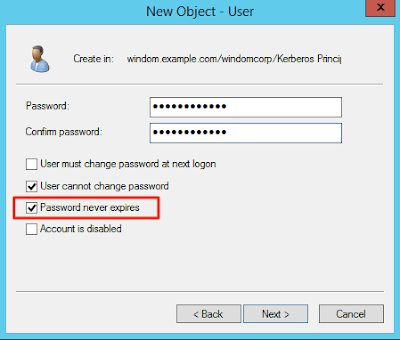
Note that I have set the
password never expires flag here. What option you choose is up to you (and your security policy) but
remember that when the account password expires, the Kerberos key in your keytab file will need reissuing.
OpenAM uses the GSS API for Kerberos which supports the full 256bit strength of Kerberos encryption, as long as the Java unlimited strength cryptography policy is installed. Select the option to ensure the account supports 256 bit Kerberos encryption in the the account tab:

Creating a KeyTab file
Next you will create a
Kerberos keytab file. KeyTab is short for key table. A keytab file is a table of keys that map to Kerberos principals. The keys can be used to authenticate to a Kerberos realm. Keytabs are designed to allow services, applications and scripts to authenticate to a Kerberos realm without human interaction using the key(s) stored in the keytab file. This is part of the Kerberos standard and is not unique to Active Directory.
OpenAM uses the keytab to authenticate to the Active Directory Kerberos realm. Once authenticated, OpenAM verifies the owner of the Kerberos ticket which is supplied in the SPNEGO process from the user's web browser. I will cover this in more detail in part two of this blog post, where I will examine the Kerberos communication with a network analyser.
In Active Directory, you generate keytab files using the
ktpass command. This creates a key for an account in AD (a principal) which is derived from the user's password. If the password on the account changes, the key becomes invalid.
The ktpass command also writes a number of attributes to the user account and it can manage transition between two keys. I will cover how this works in the second part of this blog post.
The following is an example of running the ktpass command on an active directory domain controller. The
+rndpass and
/maxpass options set a random 256 character password on the account which is then used to derive the key in the Kerberos principal.
ktpass -out fileName.keytab -princ HTTP/hostname.of.openam@KERBEROS.REALM.NAME -pass +rndPass -maxPass 256 -mapuser <userAccount> -crypto AES256-SHA1 -ptype KRB5_NT_PRINCIPAL -kvno 0
As it is case sensitive, make sure that the principal name is in exactly the following format:
HTTP/openam.windom.example.com@MYDOMAIN.EXAMPLE.COM
…where,
openam.windom.example.com is the host name of OpenAM. If OpenAM is behind a load balancer, make this the hostname of the load balancer.
MYDOMAIN.EXAMPLE.COM is the name of the Kerberos realm - the FQDN of the Active Directory domain.
In the domain we’ve been building so far, the command will look like the below:
You should now have a keytab file:

This file contains sensitive authentication keys. You should store it in a protected file system location, in a similar way to protecting private SSL keys.
Setting up Windows Desktop SSO in OpenAM
Copy your keytab file to a secured location on your OpenAM server(s) and set up a Windows Desktop SSO module. If you have based your configuration on my blog post for
setting up an Active Directory DataStore, then you'll want to take the following steps in your employees realm:
Again, make sure the principal name is typed correctly, matching the case below.
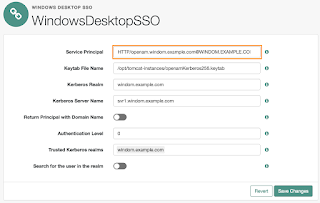
Once that is complete, you can make a chain in your realm to begin testing the new authentication module.
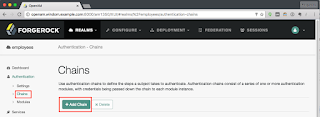
For now, I've made a chain that only contains the Windows Desktop SSO module in order to observe any error messages that may occur.

Configuring the web browser
On a Windows Desktop, Internet Explorer, Edge and Google Chrome take a number of browser security settings from "Internet Options" on the Windows control panel. By default, these settings cause a user to re-enter their Windows domain credentials before the browser will submit a Kerberos ticket as part of
SPNEGO (aka Integrated Windows Authentication).
Authentication should still succeed, but it's not a very user friendly experience.
The security zones' default settings permit automatic submission of a Kerberos ticket to sites in the Intranet Zone. If you add OpenAM's URL to this zone, the user will automatically be signed on with their Windows credentials.
Again, if you are setting this up on anything more than a test active directory instance, you will want your friendly Windows SysAdmin to change your internet options, as these settings will most likely be controlled by group policy.
You can find Internet Options on the Windows control panel, but my favourite way to open it (because this works on all versions of Windows since 95) is to run inetcpl.cpl from the command line or the Windows run box (WinKey+R):
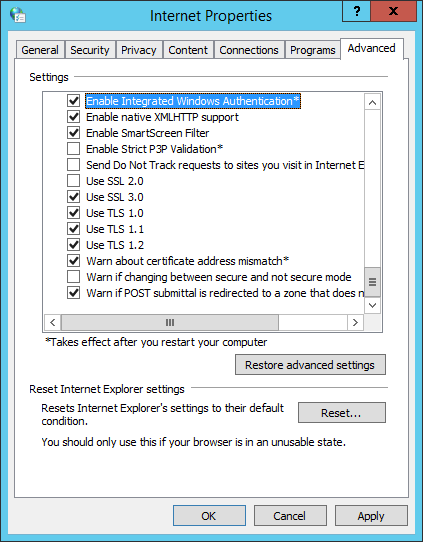
This is likely the only configuration required in the browser settings. However, if you are having problems with IE or Edge specifically, check that "Enable Windows Integrated Authentication" is selected on the advanced tab:
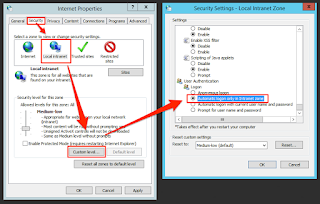
Also check that the security settings for the intranet zone are set to "automatic logon only in intranet zone".
Now try authenticating using the "wdsso" chain:
http://openam.windom.example.com:8000/am1350/XUI/#login/employees&service=wdsso
Make sure your dataStore can load a profile after authentication
You may find that Windows Desktop SSO appears to work correctly now. However, this may apply solely to accounts where the CN matches the Windows account name, such as the domain administrator account.
Once OpenAM has authenticated a user using one or more authentication modules, it is normally configured to retrieve a profile from a dataStore - in your case this is Active Directory. In order to retrieve the profile, the authentication modules obtain a name that will be used to lookup the user. The Windows Desktop SSO module provides the windows account name (without the domain component) for this, but the Active Directory type of dataStore is by default configured to search for a user based on the CN, not the "sAMAccountName" attribute, which contains the Windows account name. If the CN does not match the sAMAccountName, as is usually the case in Active Directory, then the profile will not load after authentication. When that happens, you will see the error, "User Requires Profile to Login".
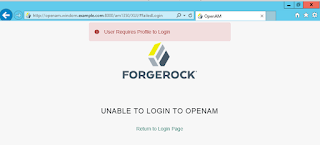
If you have followed my previous blog posts on setting up an Active Directory Domain and setting up an Active Directory dataStore in OpenAM, this error will occur. In order to rectify, you need to change your dataStore to retrieve the profile using the sAMAccountName attribute:
If you also wish to use the dataStore authentication module and allow users to login with that username, you can change the "authentication naming attribute" in your dataStore.
At this point, you should now be able to authenticate using Windows Desktop SSO. But what happens when the user isn't using a domain-joined computer?
Configuring fallback to the dataStore module
Now that your Windows Desktop SSO module is working and the user profile is retrieved, you will configure an extra module in the chain to allow a username and password prompt to be supplied if the user's browser is not configured for Kerberos authentication.
Below I've set the "wdsso" chain to attempt Kerberos authentication using the Windows Desktop SSO module. Because it is set to "sufficient", it will only proceed to authentication via the dataStore module if authentication via Kerberos fails.

Note: Versions of OpenAM prior to v.13.0.0 required a custom error page to be implemented, allowing a failed login on the Windows Desktop SSO module to progress to the next module in the chain. This is no longer required.
UPDATE: That's not quite always true. The change in OpenAM 13 allows the WDSSO module to fall back to another module if the browser has negotiate support turned off, for example as it is by default in Safari and FireFox. However, this won't prevent the login dialog (shown above) from appearing if negotiate support is turned on in the browser, as it is by default in IE. I'll look into this in more detail in my next blog post.
That's it!
Windows Desktop SSO should now authenticate users who are logged in on a domain-joined computer to OpenAM.
Part 2 of this blog post will look at the mechanics behind Kerberos authentication by analysing the network traffic and will also address common scenarios that can cause Windows Desktop SSO to fail.

