This post walks through setting up a single Windows machine that you can use for testing various parts of the ForgeRock stack that integrate with Microsoft products. It is aimed at those who are tech-savy but new to Microsoft Active Directory.
By the end of the walk through, you should have:
By the end of the walk through, you should have:
- A Windows Active Directory domain
- An Active Directory DNS server
- An Active Directory LDAP service, running on SSL
- Active Directory Certificate Services - a CA.
- A kerberos realm.
- A vaguely realistic directory layout with sample users.
- PowerShell scripts for configuring the above.
The above items should allow you to test:
- OpenAM - Active directory authentication, DataStores, self service features and behera password policy support.
- OpenAM - Integrated Windows Authentication (Which for some reason we call Windows Desktop SSO in ForgeRock)
- OpenAM - SmartCard authentication
- OpenAM - ADFS federation with WSFED, SAML2 and OIDC.
- OpenIDM - Password Synchronisation
- Setup a Windows VM or cloud instance.
- Give the computer an appropriate hostname
- Run Windows Update.
- Install Active Directory Domain Services (ADDS, also known as “promotion to a domain controller”)
- Install Active Directory Certificate Services (ADCS). Amongst other things this is a quick way of installing a certificate on the LDAPS port of a Windows domain controller.
- Allow all users to log on locally.
- Creating a sample AD structure in PowerShell
Set up a Windows Machine
To get hold of a Windows Server instance that you can start playing with, you can either build an instance yourself on your local or on-prem virtualisation software, or rent an instance from the likes of AWS and Azure.
At the time of writing, the most up to date edition of Windows server is 2012 R2, which is what I will use for the remainder of this post.
I find it easiest to perform most of my testing on a local VM on my laptop. If you don't have an MSDN license or a licensed copy of Windows Server to hand, Microsoft give away a fully functional 180 day trial of Windows Server 2012 R2.
For testing, a Windows 2012 R2 server will scrape by on 2GB of RAM, but I would give it at least 4GB if you can. And while it will install happily on a 20GB hard disk, don't expect there to be much room for Windows updates or any other software you may want to install. Some cloud providers offer 20GB images, I would avoid these if you can afford it. Go with 40GB at least to avoid constantly having to juggle things around.
Setting up a VM and automating it
Install your copy of Windows Server from the ISO file. I won't detail going through the installation steps on the first few screens, they simply ask for things like localisation, keyboard layout and the password of the administrator account. I find that the data centre edition covers all the features I need.
If you want to skip through all of this, you can set up an autounattend.xml file and add it to the root of your Windows Server ISO image. Here is one that I made which works with the 180 day trial images of server 2012 R2. I made this using the Windows ADK, but you can also use some third party generator websites or just start with another one and manually edit it yourself.
If you choose to use my autounattend.xml, it is set up with the following:
username: administrator
password: Cangetinwin1
hostname: svr1
IE ESC: disabled
I have disabled IE ESC (aka that setting that prevents Internet Explorer from doing anything at all on Windows Server) above for testing purposes, but in production I would avoid doing this.
Using a cloud instance
A windows machine in the cloud will likely boot straight to the desktop, there isn't much you need to do. Make sure you can remotely access it by remote desktop (tcp port 3389) from your IP address and make sure you have a remote desktop client handy. Windows obviously comes with one (mstsc.exe), there are some great ones for mac and Linux too.
Choose your weapon - server manager or PowerShell
When you first boot to a Windows 2012r2 desktop, you'll see four icons on the start bar. First is the Windows 8 start menu, which I would avoid.
Second is the server manager. This useful tool provides quick access to almost everything you need to administer Windows server. I will describe using it to access various tools in the remainder of this post.
Thirdly is PowerShell. I'll also describe how to do most things on this post with PowerShell.
The fourth icon is good old windows explorer, which gives you access to the file system.
The fourth icon is good old windows explorer, which gives you access to the file system.
Run Windows Update
In production, your Windows updates would be carefully managed via group policy and possibly a private Windows Server Update Services (WSUS) Server. For test and evaluation, it's up to you whether you want to get updates from Microsoft. For testing, I would run it once and then turn it off.
To access the Windows Update settings in server manager, navigate to Local Server > Windows Update.
To access the Windows Update settings in server manager, navigate to Local Server > Windows Update.

Give the computer an appropriate hostname
You can skip this part if you used my autounattend.xml file above, your hostname will be svr1. Otherwise, in server manager, navigate to Local Server > Computer Name

You can also set the computer name with the Rename-Computer cmdlet in PowerShell:
Rename-Computer -NewName svr1
Install Active Directory Domain Services
Installing active directory domain services (used to be known as promotion to a domain controller) is a two step process. First of all, you install the services required for ADDS. Secondly, you configure it. As usual, you can do these with both PowerShell and server manager.
In the following steps, the following will be configured:
In the following steps, the following will be configured:
- A brand new active directory forest containing a single domain called windom.example.com
- A single domain controller, running an active directory DNS server and LDAP service.
- A Kerberos realm called windom.example.com
ADDS Using Server Manager
This may seem like a lengthy process, but it mostly consists of clicking next in the installation and configuration wizards. If you are familiar with PowerShell, you may wish to skip to the end of this section and use the PowerShell commands which achieve the same thing.
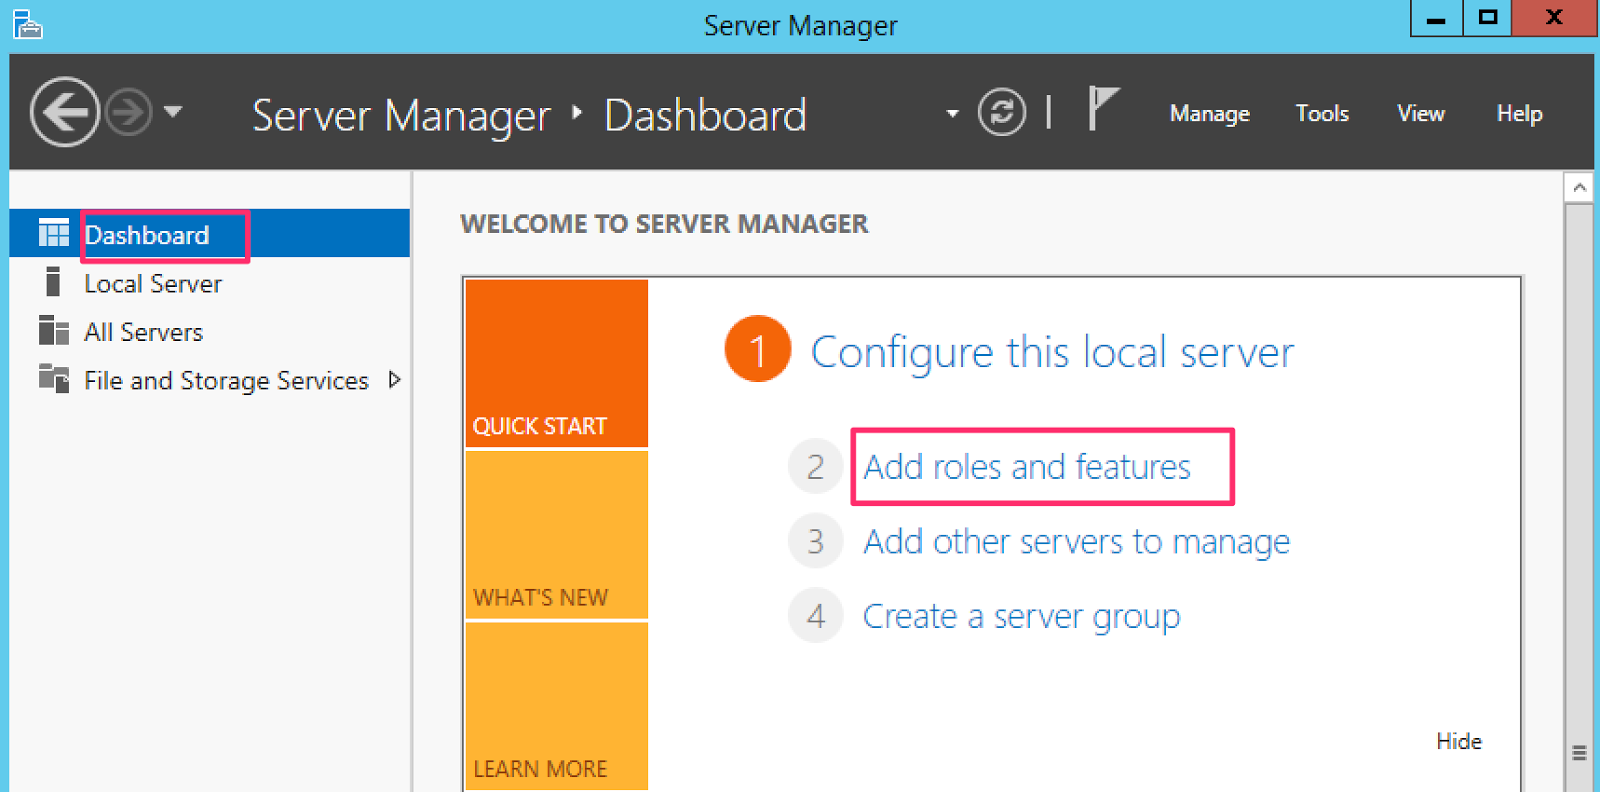
- Open up Server Manager and select "Add roles and Features"

- Click Next

- You aren't doing a RDS installation, so just click Next.

- The local server should be selected, so click next.

- Select the "Active Directory Domain Services" role. This will pop up a dialogue asking you to add some features. Go with the defaults, making sure to install the management tools, then click next. Important: Don't install certificate services at this point, this should be done AFTER domain services has been installed.

- You probably don't want to install any other features right now, so click next.

- There is some general info here about ADDS. Click next.

- You can click install at the confirmation stage.

- Now the service has been installed, you have to configure it. Note that you can export an XML file here which contains the options you have specified so far. This is useful if you want to script an unattended deployment. Click "promote this server to a domain controller" to continue with configuration.

- As we're just creating an AD setup for test and evaluation, "click add a new forest". Specify a domain name. If you are testing, make sure you either use a domain that you own or a valid test domain, such as example.com, example.org or example.net. It's bad practice to use a publicly available DNS domain for Active Directory, so choose a sub domain, such as windom.example.com

- Use the default forest and domain functional levels and make sure that you are installing a DNS server. Specify the DSRM password - this is only needed if there is a serious problem with your domain controller that prevents it from booting.

- Don't worry about DNS delegation, you are using a locally installed DNS server.

- Use the default netBIOS domain name.

- Use the default filesystem locations.

- You can now review what you have done before you start the configuration. Note that you can export a pre-made PowerShell script at this point containing what you have configured.

- The pre-requisites check should pass with some warnings about default security settings and DNS. This build is just for evaluation, so click install.

- After a couple of minutes the machine will reboot.


A this point you should now have a working Active Directory domain controller. You will be able to connect to it using LDAP on port 389, but LDAPS is not available yet.
ADDS Using PowerShell
Here is some PowerShell used to configure everything in the screenshots above. The first command uses an XML file that was generated from the "add roles" wizard above. The second command was generated by the configuration wizard.
Install-WindowsFeature -ConfigurationFilePath .\ADDS-DeploymentConfigTemplate.xml

Import-Module ADDSDeployment
Install-ADDSForest `
-CreateDnsDelegation:$false `
-DatabasePath "C:\Windows\NTDS" `
-DomainMode "Win2012R2" `
-DomainName "windom.example.com" `
-DomainNetbiosName "WINDOM" `
-ForestMode "Win2012R2" `
-InstallDns:$true `
-LogPath "C:\Windows\NTDS" `
-NoRebootOnCompletion:$false `
-SysvolPath "C:\Windows\SYSVOL" `
-Force:$true
Installing Active Directory Certificate Services
The following section walks through installing Active Directory Certificate Services (ADCS). This is the enterprise grade PKI infrastructure offering from Microsoft, which you can use to generate certificates for strong authentication, for example when implementing SmartCard authentication.
One nice thing about ADCS is that if you install it on a domain controller, it will automatically issue a certificate for LDAPS and configure the domain controller to use it. The default policy that is enabled on Active Directory prevents changes to any object from occuring over plain text LDAP. Therefore, if you want products like OpenAM and OpenIDM to write anything to active directory, for example when using self service or account provisioning, then you need to be using LDAPS.
One nice thing about ADCS is that if you install it on a domain controller, it will automatically issue a certificate for LDAPS and configure the domain controller to use it. The default policy that is enabled on Active Directory prevents changes to any object from occuring over plain text LDAP. Therefore, if you want products like OpenAM and OpenIDM to write anything to active directory, for example when using self service or account provisioning, then you need to be using LDAPS.
ADCS Using Server Manager
- Open server manager again and select "add roles and features". Select "Active Directory Certificate Services", accept the suggested features and management tools, then click next.

- You don't need any other features right now, so click next.

- There is some useful information here.

- For now, just install the certificate authority. You can come back and install further services later on if you wish.

- Once again, it's time to install the service. Just like with domain services, you can export an XML file for automating these steps.

- Once installed, click "configure active directory certificate services" to begin the configuration process.

- For our testing, using the default domain administrator account is fine.

- Select certificate authority and click next.

- We want our CA to be integrated with Active Directory so that it can automatically issue certificates to services like LDAP. Select Enterprise CA and click next.

- Create and new private key.

- I've increased the default hashing algorithm here from SAH1 to SHA256, as many applications consider SHA1 to be obsolete.

- The distinguished name and CN for the CA are set here. These can not be changed, so you may want to consider what they should be for your testing. For my testing with the ForgeRock stack, the defaults are sufficient.

- You can increase the certificate validity period here if you wish.

- For testing, stick with the default file system locations.

- Now it's time to apply the configuration. Unlike installing services like ADDS and ADFS, there is no option here to generate a PowerShell script of your options. I have created a PowerShell command with these options in the next section.

- The installation should complete successfully. Now reboot your server. On the next boot you'll find that you can connect to your active directory server using LDAPS on port 636.


ADCS Using PowerShell
The following two commands will apply the above configuration. The first command requires an XML file that was generated from the "add roles and features" wizard.
Install-WindowsFeature -ConfigurationFilePath .\ADCS-DeploymentConfigTemplate.xml

Install-AdcsCertificationAuthority `
-AllowAdministratorInteraction `
-CAType EnterpriseRootCA `
-HashAlgorithmName SHA256 `
-KeyLength 2048 `
-ValidityPeriod Years `
-ValidityPeriodUnits 10
Allow all users to logon locally
This is something that you should absolutely not do on a production domain controller.
By default, Windows server allows two simultaneous sessions from different users without having to enable the full remote desktop services service. That means you can log on to the machine as the administrator and remote desktop in as another user for testing purposes. Windows server usually runs regular desktop applications just fine (it has to for RDS) so it can make it ideal for testing services such as Office 365.
By default, Windows server allows two simultaneous sessions from different users without having to enable the full remote desktop services service. That means you can log on to the machine as the administrator and remote desktop in as another user for testing purposes. Windows server usually runs regular desktop applications just fine (it has to for RDS) so it can make it ideal for testing services such as Office 365.
The default policies on a domain controller prevent normal users from logging on. Here, we are going to change that.
Open up server manager and navigate to Local Server > Remote Desktop. This will open the "system" control panel applet (sysdm.cpl), where you can configure remotes desktop.

Creating a sample AD structure in PowerShell
I've put together a script which generates a predictable list of any number of users and a fairly typical directory layout. The script is largely based on this one by SharePointRyan, only it does a few extra things.
If you wish to use it, copy the script to your machine (you can use remote desktop to copy files). Then execute it:

You should see output indicating that 200 users have been added (this number is adjustable in the script):

The script evenly distributes the users between three OUs representing world regions. It also creates a fairly common directory layout under the OU "windomcorp" (the script uses netbios name + "corp").

Conclusion
That's it. I will use this configuration as a basis for some future blog posts that I have in the works. Next up is integrating OpenAM with Office 365, then I'll do a technical deep dive look at using supporting Integrated Windows Authentication with OpenAM.
NICE POST! TY
ReplyDeleteThe effectiveness of IEEE Project Domains depends very much on the situation in which they are applied. In order to further improve IEEE Final Year Project Domains practices we need to explicitly describe and utilise our knowledge about software domains of software engineering Final Year Project Domains for CSE technologies. This paper suggests a modelling formalism for supporting systematic reuse of software engineering technologies during planning of software projects and improvement programmes in Final Year Project Centers in Chennai.
DeleteSoftware management seeks for decision support to identify technologies like JavaScript that meet best the goals and characteristics of a software project or improvement programme. JavaScript Training in Chennai Accessible experiences and repositories that effectively guide that technology selection are still lacking.
Aim of technology domain analysis is to describe the class of context situations (e.g., kinds of JavaScript software projects) in which a software engineering technology JavaScript Training in Chennai can be applied successfully
Hi, I'm dealing with impossibility to logon remotely and locally to W2012 Server using Domain Name\samAccountName (WINDOM\AHassan184), password "B4dp4ss4me". Auth form tells me that a user must be in Administrators group. Could you help me to understand what is wrong? WINDOM\Administrator logins to the system successfully.
ReplyDeleteBy the way I can login to openam as "Aaron Hassan" and "B4dp4ss4me" without any problems.
Deletegreat
ReplyDeleteProvisioning of access to group owners and managers for project specific group management active directory
ReplyDeleteThanks for sharing active directory management tips. for more info i rfer cion systems active directiry mangement tools in USA.
ReplyDelete